Windows Client Installation
In this article we will describe the installation process of Sixa client for Windows.
Installation process step-by-step
Log into your personal account on mycloud.sixa.io where the latest version of the Sixa client is always available.
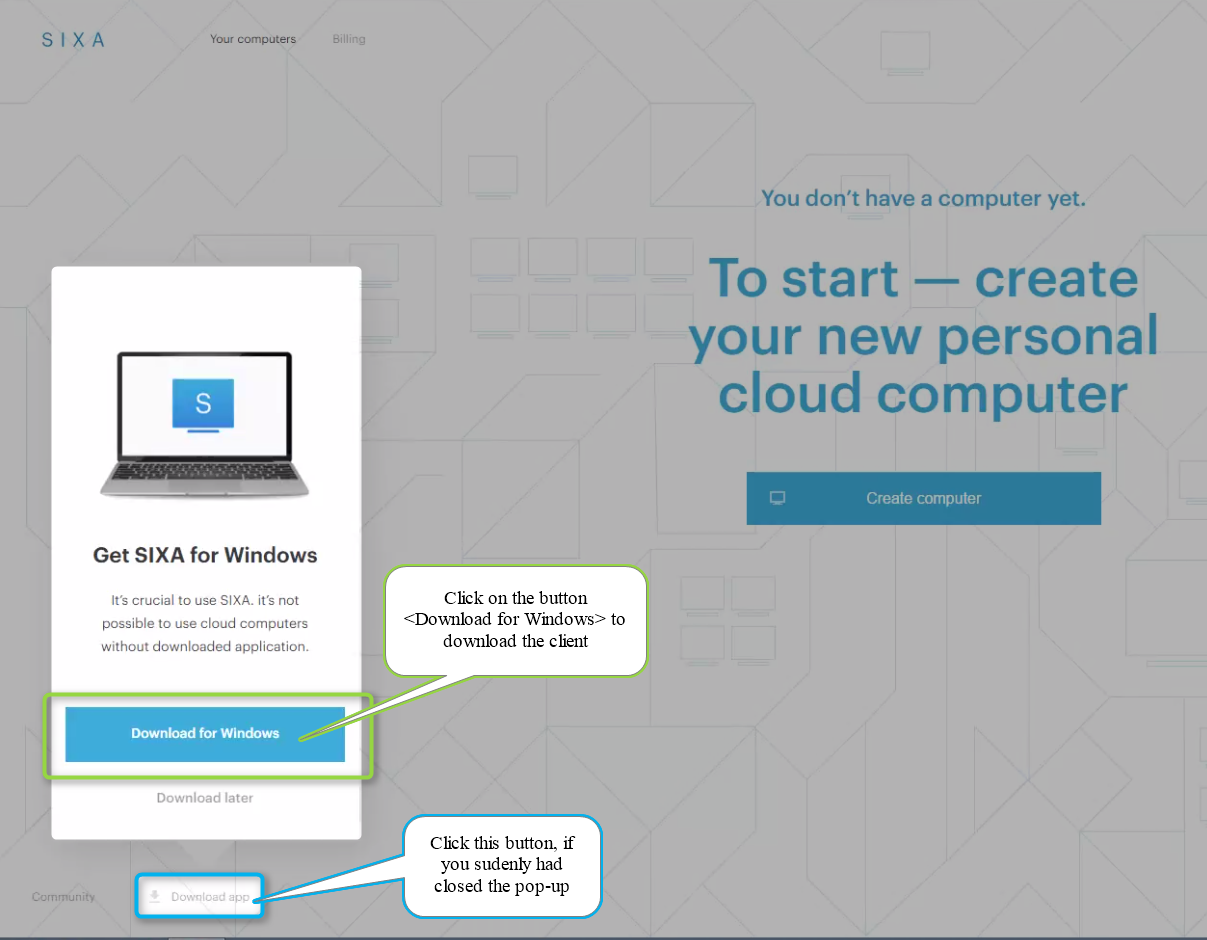
Click on the button to install the client. The browser will start the download process. When downloading is finished, you can begin installation.
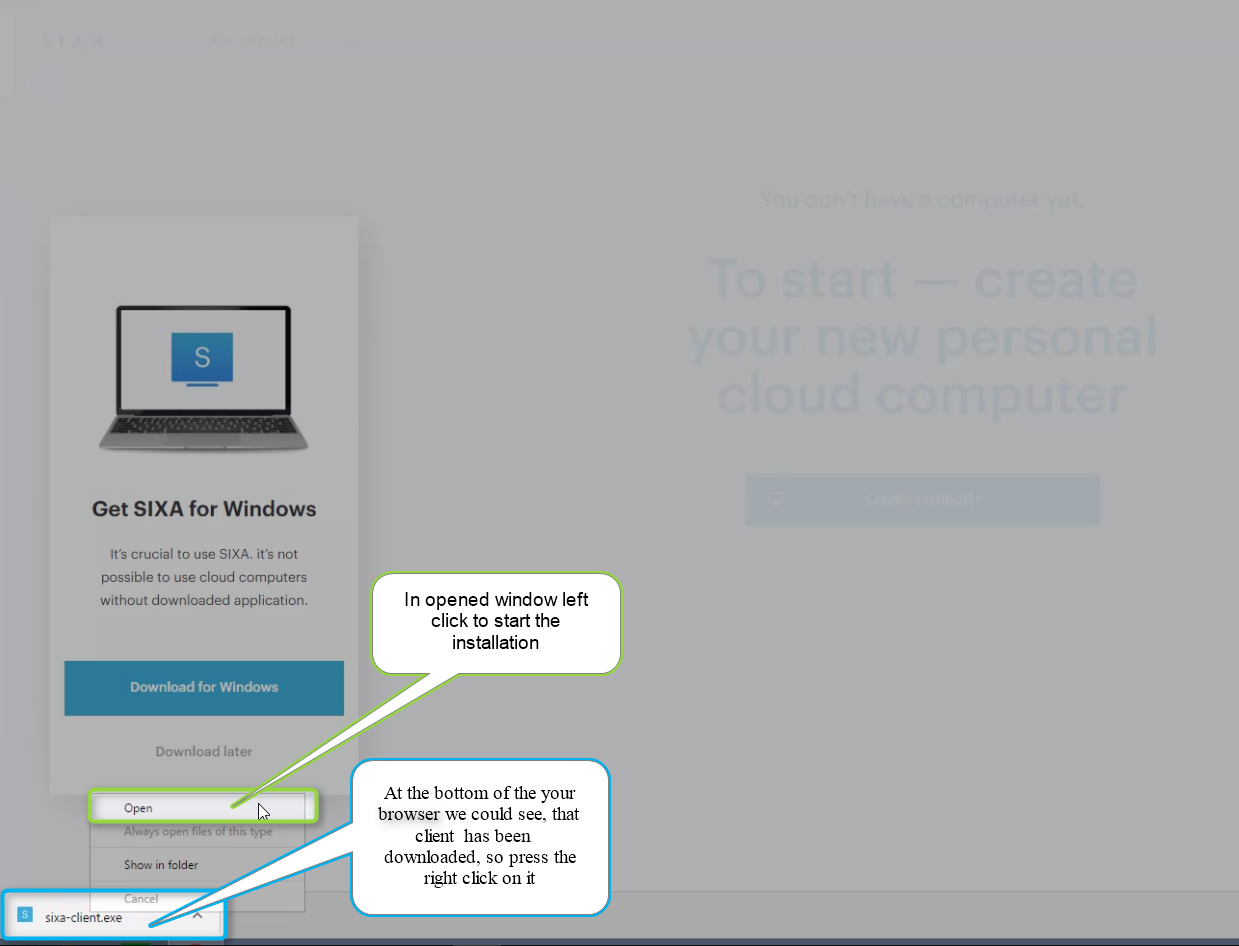
If a window pops up asking you for permission for the installation to make changes, click “Allow”.
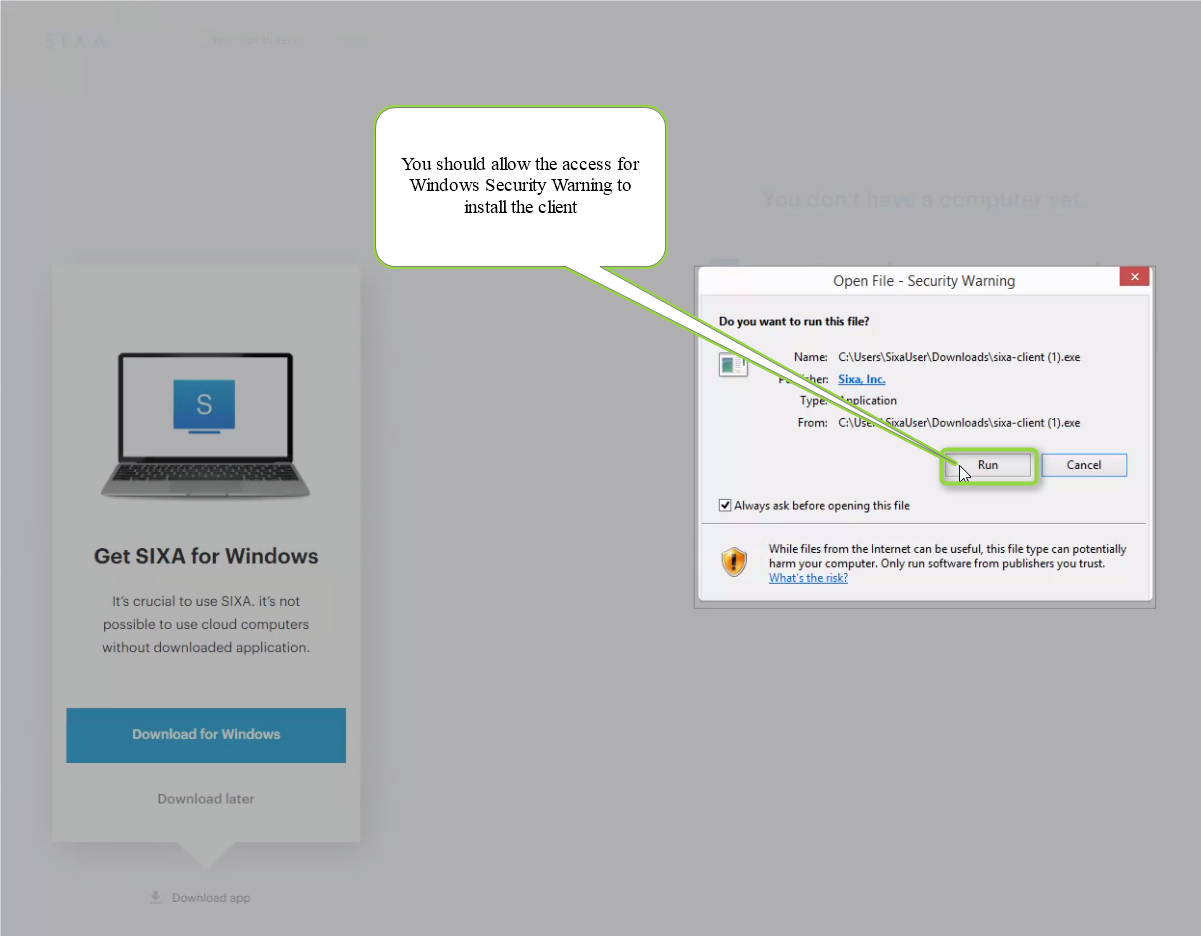
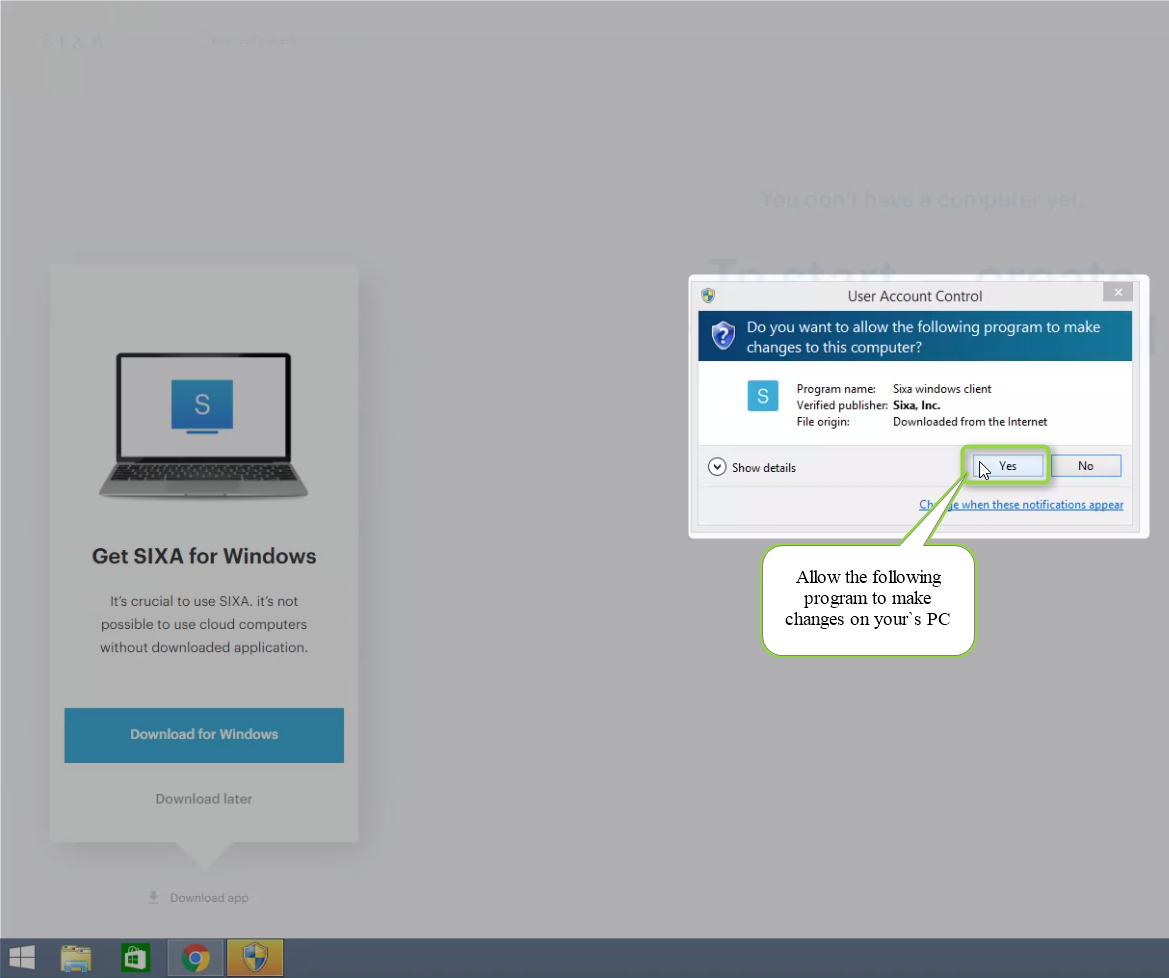
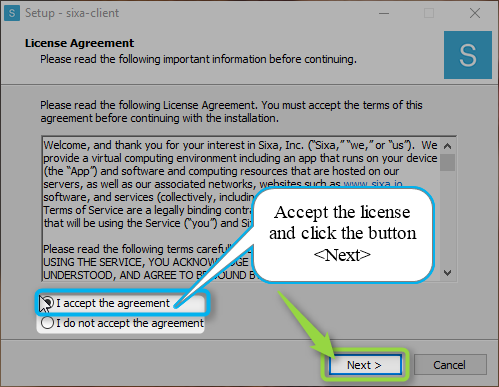
Read and accept the License Agreement.
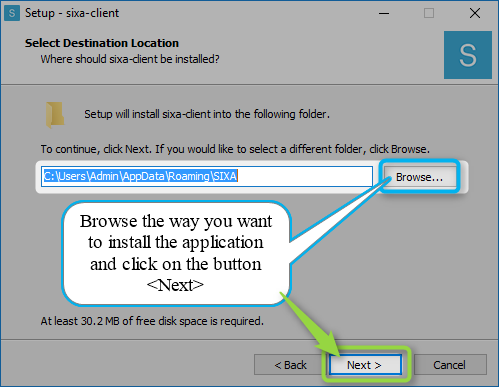
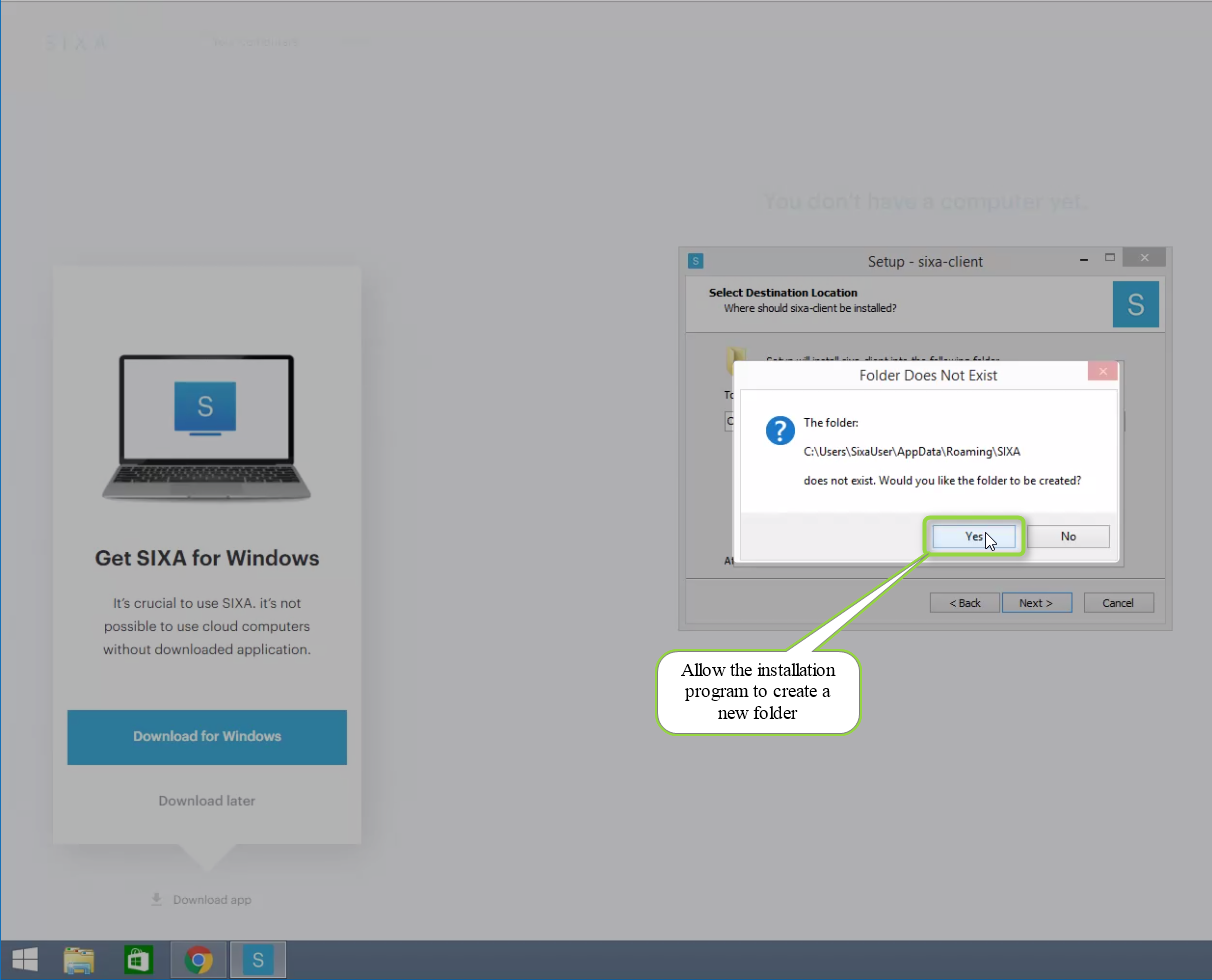
Change the destination folder for the Sixa client where necessary. It is recommended you install Sixa in the default folder.
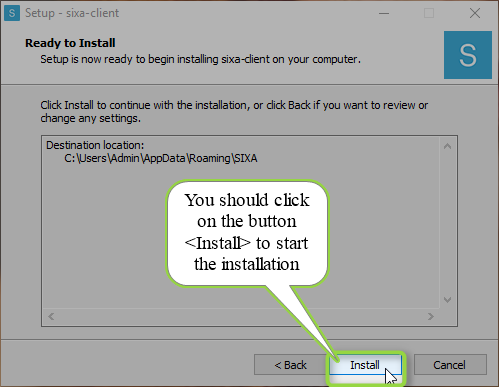
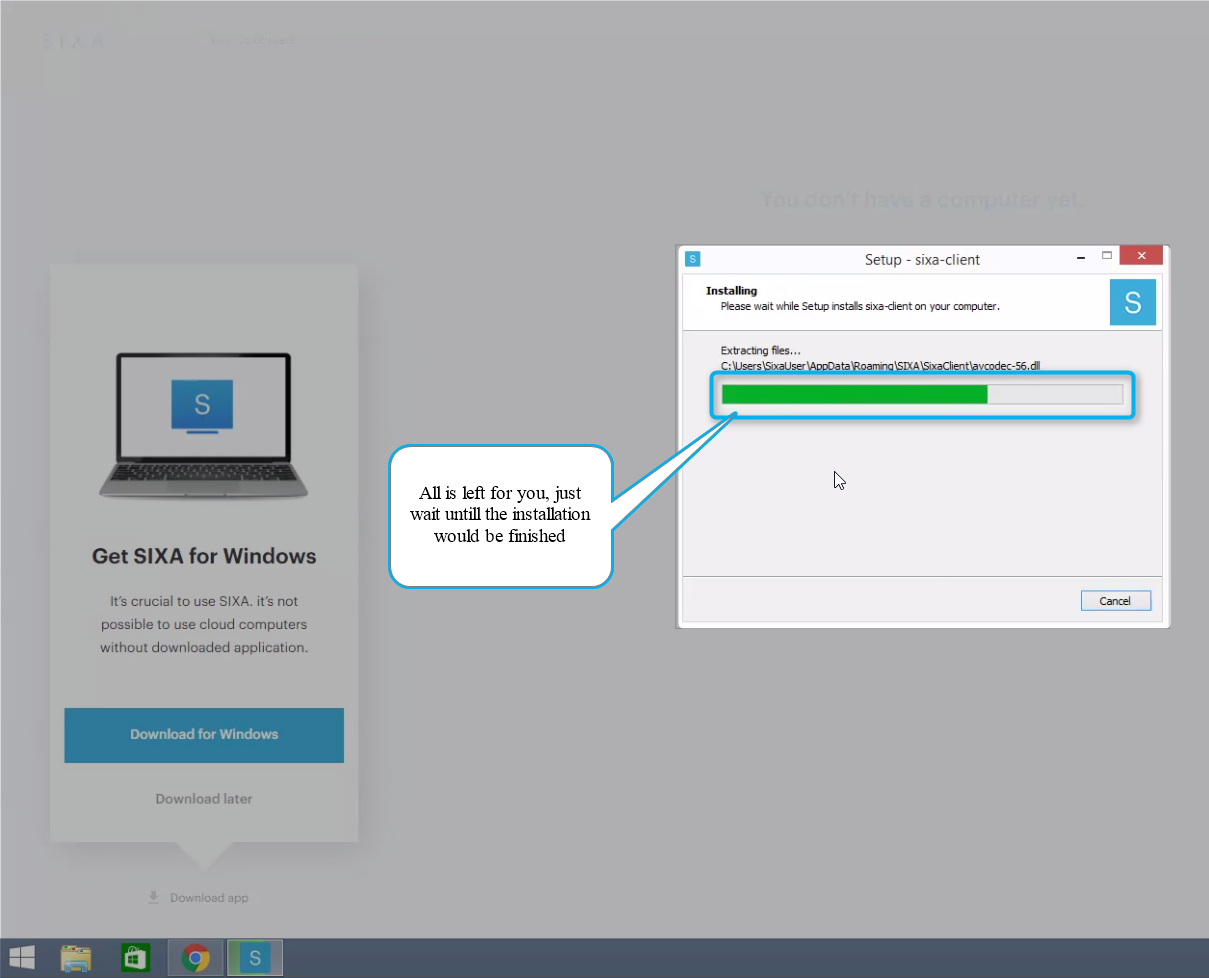
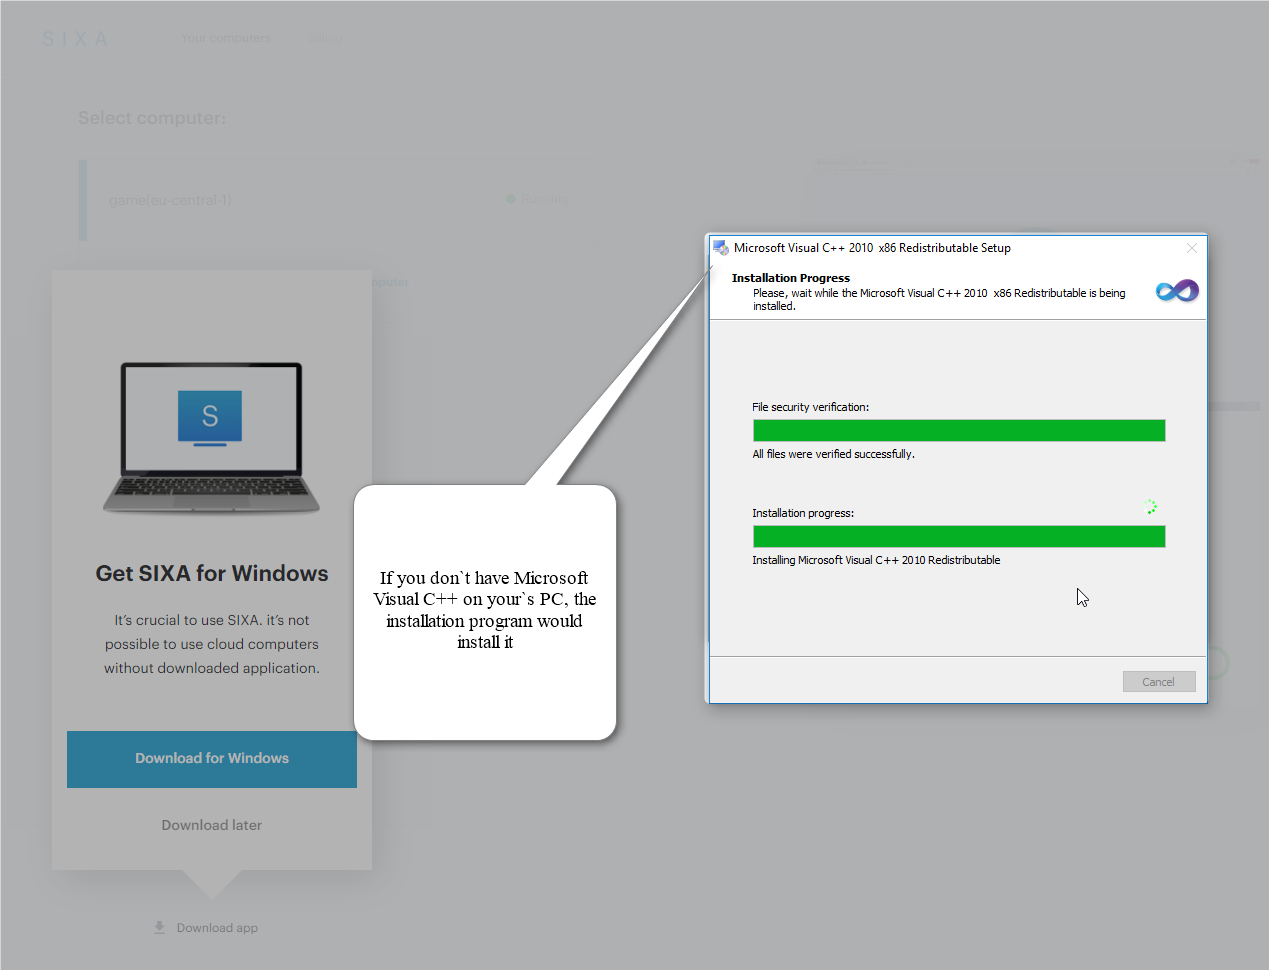
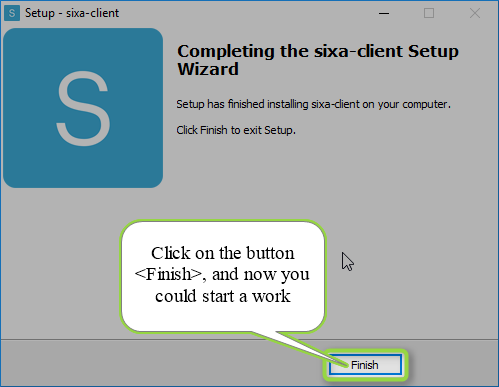
That's all. Now you are ready to start using your personal Cloud PC. Enjoy!
Does this answer your question? If not, contact us using one of these methods:
- Using online chat on SIXA or MyCloud.
- Write your question in an e-mail to [email protected].
Updated almost 7 years ago
